How to set up Meta Business Manager the right way
I remember the first time I tried to run ads for a friend’s e-commerce store. I had access to his personal Facebook profile, his business page was connected to some random old ad account, and nobody could figure out who actually owned what. We spent two hours fixing permissions instead of building campaigns.
That experience taught me something early: the setup matters as much as the strategy. Maybe more.
Meta Business Manager now officially called Meta Business Suite in some interfaces, though most people still call it Business Manager. It is the central hub where everything lives. Your Facebook page, your Instagram account, your ad account, your pixel, your team members. Get it right once and everything downstream becomes easier. Skip it or rush through it and you’ll be untangling problems for months.
Getting this right once means you never have to think about it again.
Why this step gets skipped
Most people jump straight into Ads Manager because that’s where the ads are. Business Manager feels like admin work. It looks boring. There’s no obvious reason to care about it until something breaks.
But when something breaks and it will at some point, having a clean Business Manager setup is what keeps a small problem from becoming a crisis. Ownership issues, access problems, pixel conflicts, payment failures. These are all ten times harder to fix when the foundation wasn’t set up correctly.
Start with the right account
The first thing to understand is that Business Manager should be set up under a real person’s Facebook profile — ideally the business owner or whoever has long-term responsibility for the account. Not a fake profile, not a shared login, not an intern’s personal account.
Meta ties your business assets to a real identity. Fake accounts get flagged. Shared logins create access chaos when people leave. Starting with a legitimate personal profile is the simplest way to avoid a lot of future headaches.
Go to business.facebook.com and click “Create account.” You’ll be asked for your business name, your name, and your business email. Keep the business name consistent with what you use elsewhere — on your website, your invoices, your other platforms. Consistency helps if Meta ever needs to verify your account.
Connect your Facebook page
Once your Business Manager account exists the next step is connecting your Facebook page to it.
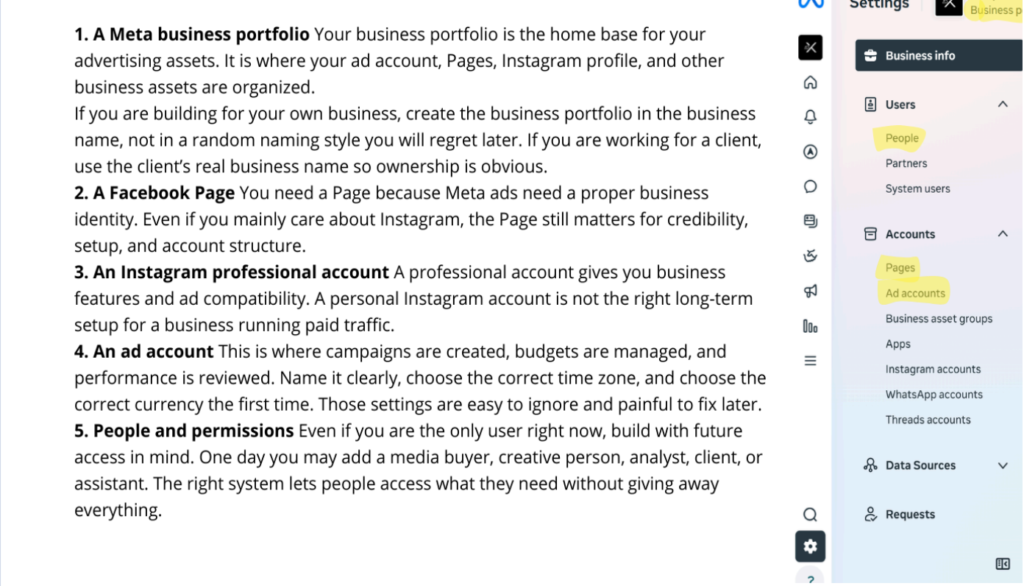
Go to Business Settings, then find “Pages” in the left column. You can either add an existing page you manage or request access to someone else’s page. If you’re the owner of the page you’ll add it directly. If you’re an agency or a freelancer working for a client you’ll request access instead, and your client will need to approve that request from their end.
The distinction matters. Adding a page means you own it inside Business Manager. Requesting access means the client retains ownership and you have a defined role. For client work always request access. Never add a client’s page as if it’s yours.
Set up your ad account
Your ad account is where your campaigns and billing live. Inside Business Settings go to “Ad Accounts” and either create a new one or add an existing one.
A few things worth knowing here. Each Business Manager can have multiple ad accounts useful if you’re managing ads for more than one business. Each ad account has its own billing, its own spending limits, and its own pixel (though you can share pixels across accounts if needed).
When you create a new ad account you’ll need to set the time zone and currency. These cannot be changed later. Pick your actual time zone and your actual business currency. Getting this wrong causes reporting confusion that never fully goes away.
Add your Instagram account
If you’re running ads that show on Instagram, and you should be, given how much inventory lives there, you’ll want your Instagram account connected directly in Business Manager.
Go to “Instagram accounts” in Business Settings and add it. You’ll log in with your Instagram credentials to confirm ownership. Once it’s connected you can use it as an identity in your ads and run placements across both Facebook and Instagram from the same campaign.
Manage people and permissions
This is where a lot of setups go wrong. Business Manager has two levels of access: business-level roles and asset-level roles.
At the business level you have employees and admins. Admins can do everything including managing other people’s access. Employees can only access the specific assets you assign to them.
At the asset level you assign people to specific pages, ad accounts, or pixels with defined roles. An analyst might get view-only access to an ad account. A media buyer gets standard access to create and edit campaigns. A senior advertiser might get admin access to everything.
The principle here is simple: give people exactly the access they need and nothing more. It keeps things cleaner, reduces the risk of accidental changes, and makes offboarding someone much easier when they leave.
To add someone go to “People” in Business Settings, add their email address, assign them a business role, then go to each relevant asset and assign them the appropriate asset-level role.
Verify your business
Meta offers a business verification process that unlocks higher spending limits and adds a layer of credibility to your account. It’s not mandatory to start advertising but worth doing early.
You’ll find it under Business Settings > Security Center. Meta will ask for documentation, usually a business registration document, a utility bill with your business address, or something similar depending on your country.
Verification takes a few days. Start it early so it’s done before you need it.
A clean setup is a quiet setup
The best Business Manager configuration is one you never have to think about again. Everything connected properly, the right people with the right access, billing set up cleanly, verification done.
Once this is in place you can focus on what actually moves the needle, your pixel, your campaign structure, your creative. All of which depend on this foundation being solid. Every step involved in building that foundation properly is worth the hour it takes.
With Business Manager set up the next critical piece is your tracking. Specifically getting your Meta pixel installed correctly so the data flowing into your campaigns is clean and reliable. A broken pixel sends Meta the wrong signals and that costs you money quietly over time. The Meta pixel installation guide walks through exactly how to get it right.